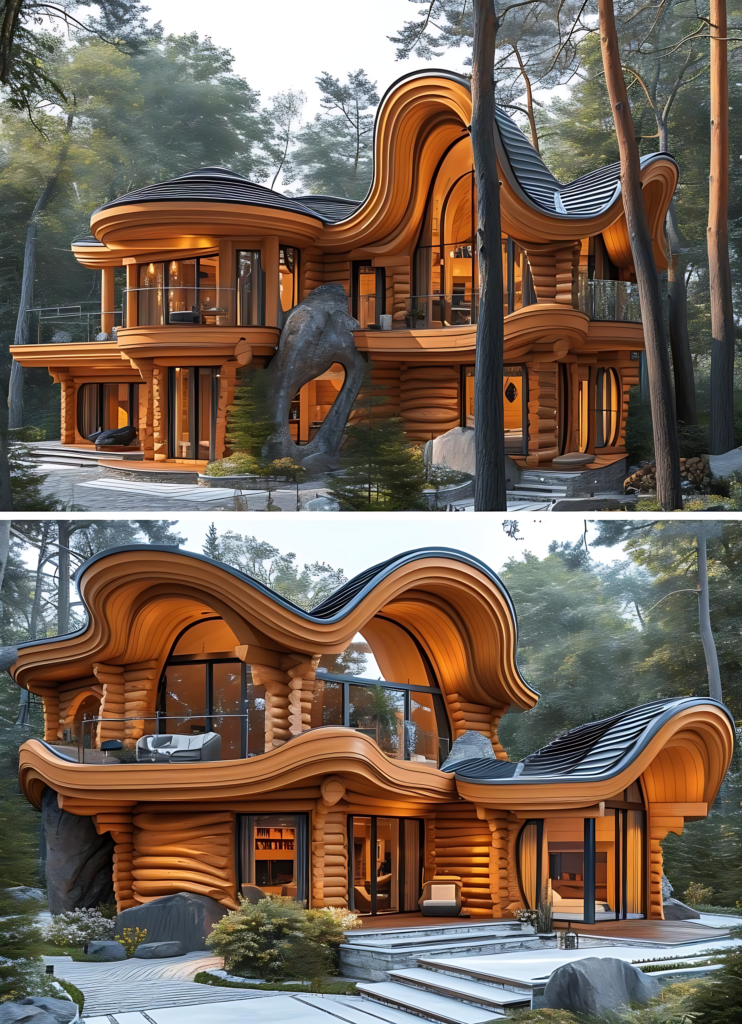
Okay, let’s break down the differences between the top and bottom images:
- Perspective/Angle: This is the most significant difference.
- Top Image: Taken from a slightly higher vantage point and perhaps a bit further back or more to the left. It gives a broader view of the house’s multiple levels, especially on the left side, and includes a distinctive large, grey, somewhat abstract rock sculpture near the center-left.
- Bottom Image: Taken from a lower vantage point and seemingly closer to the house, focusing more on the front entrance area and the right side. This angle emphasizes the dramatic curves of the roofline and the immediate foreground landscaping/decking.
- Visible Features: Due to the different angles:
- Top Image: Shows more of the upper floors, the left-side balconies, and the large rock sculpture mentioned above. You see more of the overall massing of the building.
- Bottom Image: Provides a clearer view of the ground floor entrance, the decking/patio area in front, specific furniture on the main upper balcony (grey sofa, black chair) and ground-level patio (white/grey chair), and the integration of smaller rocks into the immediate landscaping. The large sculpture from the top image is not visible.
- Foreground Elements:
- Top Image: Features a simpler pathway leading towards the house and the prominent large rock sculpture.
- Bottom Image: Shows a more complex, multi-tiered decking/pathway system in the immediate foreground, along with different landscaping rocks and bushes.
Essentially, they are two different views of the same uniquely designed house, showcasing different aspects of its architecture and landscaping integration.